
Fluorescence microscopy

Amazing scientific advancements have been made in recent years, and the protocol for conducting a research project calls for a variety of tools, the microscope being one of the most crucial. We will learn about fluorescence microscopy in this post, which is a development of the light microscope. Enhancing the contrast between the specimen and the backdrop is the main focus of microscopy advancements. Compared to other optical microscopy techniques, fluorescence microscopy offers much better contrast.
Table of Contents
Fluorescence microscope history
While researching the mineral “fluorspar” in 1852, Irish scientist Sir George G. Stokes discovered fluorescence. He noticed that the crystal emits red light when exposed to blue light. German physicists Otto Heimstädt and Heinrich Lehmann built the first fluorescence microscope from UV microscopy between 1911 and 1913. After Albert Coons created a method for labelling antibodies with fluorescent dyes in the early 1940s, a new era of fluorescence microscopy was ushered in.
Also read- Confocal Microscopy – My Biology Dictionary
Conventional versus fluorescent microscope differences
A fluorescence microscope, on the other hand, uses a much higher intensity light source to excite a fluorescent species in a sample of interest. A traditional microscope uses visible light (400-700 nanometers) to illuminate and produce a magnified image of the sample. Instead of the original light, this fluorescence species instead emit a lower intensity light with a longer wavelength, which magnifies the image.
Fluorescence microscopy: what is it?
To begin with, a special method of utilising a microscope to learn characteristics of a specimen that are frequently hidden from view by conventional bright-field microscopy is fluorescence microscopy. When specimens are illuminated from the outside, from below, or from above in bright field microscopy, dark items are seen against a light background. In fluorescence microscopy, the specimens are self-illuminated by internal light specifically, making it easier to observe brilliant things in vivid colour against a dark background. Fluorescence microscopy is particularly sensitive and selective due to these characteristics.
Fluorescent microscopy’s fundamentals
The majority of cellular components lack colour and are difficult to detect under a microscope. Staining the component with dyes is the fundamental tenet of fluorescence microscopy. Fluorescence dyes sometimes referred to as fluorophores or fluorochromes, are compounds that absorb excitation light at a specific wavelength (typically UV) and release light at a longer wavelength after a brief delay. It takes only a brief amount of time—typically on the order of nanoseconds—between absorption and emission. Moreover, the location of the fluorophores can then be determined by filtering the emission light from the excitation light.
Main principles
- Fluorophores, native or man-made
- Excite with one colour(wavelength A)
- Emits with different colours (wavelength B)
- Different fluorophores have different colour properties.
- Use specialised filters to split colour to see specific fluorescent probed
- Use of new fluorescent protein (XFPs for instance, GFP)
The light source
High-pressure mercury or xenon vapour lamp. Laser and LED sources, emit the UV into the red wavelengths.

Image source: commons.wikimedia.org
Use of fluorescein as a fluorophore in a fluorescence microscope
- A set of glass filters for viewing fluorescein requires that all wavelengths of light from the lamp be blocked except for the 488nm light.
- The 488nm light is then directed toward the specimen using the dichromatic mirror after passing through a filter that lets the most quantity of 488nm light through it (THE EXCITER FILTER).
- The 488 nm light excites any fluorescein labels present in the specimen, and the subsequent 518 nm light that is emitted from it returns through the dichromatic mirror and the barrier filter to the detector.
- The emission filters ensure that only the signal from the target fluorochrome (518 nm) is allowed to pass through to the detector.
Detection
For imaging specimens that have been labelled with two or more fluorochromes, chromatic mirrors and filters can be made to filter wavelengths between two and three.
- The fluorescence released from the material is frequently too weak for the human eye to see, or it may be outside the eye’s detecting range, such as in the far-red spectrum. Such a signal is easily detected by a digital camera with a sensitive sensor, such as a CCD or a PMT.
Fluorophores
Fluorophores or fluorochromes are molecules that have the ability to emit fluorescence when excited by light. Green fluorescence protein (GFP) from the jellyfish Aequorea victoria is one of the most recognised biological fluorophores. However, in live-cell imaging research, the use of GFP and its variations as fusion proteins is extremely helpful. Another key point is that fluorophore compounds often have a very tiny energy gap between their ground and excited states. This makes it possible to excite them with even low-energy photons. The versatility of simultaneous imaging of many cellular, subcellular, and molecular components is made possible by the availability of a large variety of fluorophores with suitable wavelength ranges.
All things considered, the wavelength range offered by the fluorophores now in use is adequate. Moreover, a fluorophore’s inherent features, which depend on the energy state of the electrons in their outermost orbital, include its absorption and excitation wavelengths as well as its capacity for recurrent excitation/emission cycles. Thus, a fluorophore’s usefulness is determined by its extinction coefficient, quantum yield, and duration of fluorescence.
Immunofluorescence microscopy
- This microscopy is used to map the spatial distribution of macromolecules in cells and tissues.
- Highly specific binding of antibodies to protein
- Antibodies are labelled with a fluorescent probe
- Primary antibody and fluorescent-tagged secondary antibody.
Epifluorescence microscopy
A fluorescence microscopy technique that is particularly popular in the life sciences is epifluorescence microscopy. Instead of going through the specimen first, the excitatory light is passed from above (or, for inverted microscopes, from below), via the objective lens, and then onto the sample. The same objective that was used for excitation is utilised to focus the emitted light from the specimen’s fluorescence onto the detector.
Numerous branches of research and medicine use fluorescent microscopy. Fluorescence microscopy has a wide range of applications. They are in medicine, environmental monitoring, biological research, and public health. Medical laboratory diagnosis is the most typical.
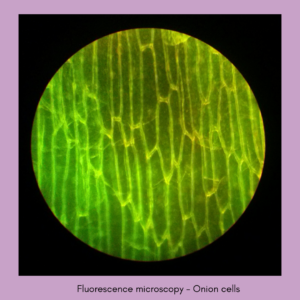
Image source: commons.wikimedia.org
- Fluorescent staining in tuberculosis
The Auramine-rhodamine process uses a yellow fluorescent dye to visualize fluorescent Mycobacterium tuberculosis under a fluorescence microscope. Potassium permanganate or acridine orange can be used as a counterstain. Under the lens, the bacterial cells will appear green. The Auramine-rhodamine stain is more sensitive than the Zhiel-Nelson and more cost-effective.
- QBC Malaria test
The QBC malaria test is a fluorescence microscopy-based malaria diagnostic test that speeds and simplifies malaria detection.
To summarize, fluorescence microscopy is a growing field with new research going on. The purpose is to find more effective techniques.
Watch – Fluorescence Microscopy – YouTube

